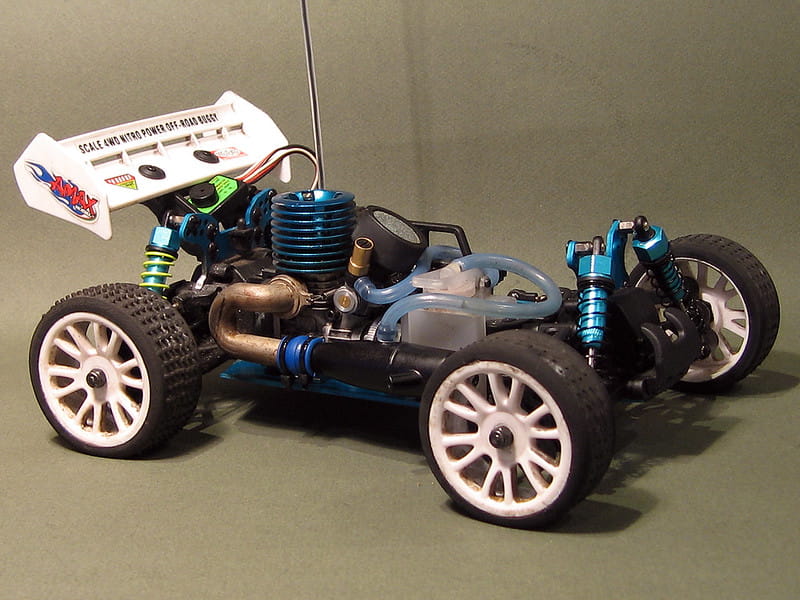
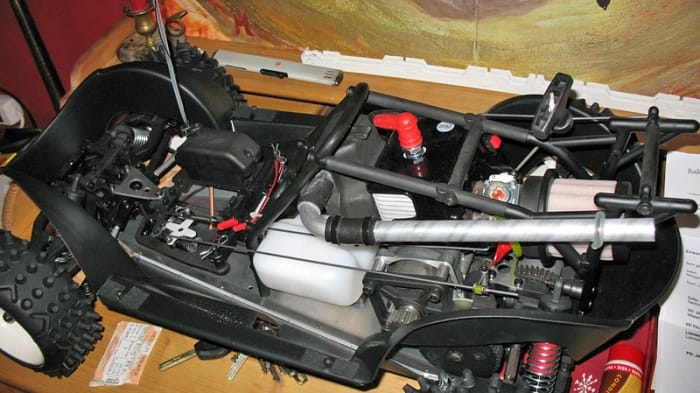
Learning to set up and getting accustomed to your newly purchased nitro RC car is a fun experience for any player.
Though the owner’s manuals do provide instructions on starting the vehicle, the details may not be clear enough.
You need to gather the proper tools and carry out each step carefully, which is not an easy task for beginners.
Therefore, I will provide easy and detailed instructions on how to start a nitro RC car and help save your effort.
Follow the instructions attentively, and you’ll learn that setting up a nitro RC vehicle is child’s play. Now let’s jump straight in!
Things To Note Before You Start
Before you start, please note that every minor step counts. So please follow each instruction carefully and get your RC car’s engine to start.
In addition, pay attention to the environment and surrounding temperature.
If the nitro car’s engine gets cold, it will struggle to start or may not turn on at all. For the winter months, avoid setting up the nitro car outside.
Instead, stay in the room or find a warmer space to carry out the task.
But don’t close the door or stay in the enclosure space because the nitro engine will spread the fumes when it’s running. Just ensure that the temperature is not too freezing.
In addition, you should grasp some basics about the nitro engine’s mechanism and operation to follow the guide more easily.
To explain it simply, the nitro engine needs fuel and air from the fuel tank and air filter to operate.
These two components are mixed and compressed inside the engine. Then the car’s glow plug will ignite this mixture and cause an explosive effect.
The force from that explosion will press the pistol down and turn on the engine.
The key is to keep the flowing air at a moderate level. If too much air flows inside the engine, the explosion gets too big and makes it impossible to start.
How To Start A Nitro RC Car With 9 Steps?
I will try to explain every step in clear detail so you can follow it easier. However, not all nitro RC cars feature a similar design with the same components.
Therefore you should combine the instructions below with the owner’s manual to avoid false setups. Now let’s move on to the first step.
Step 1: Gather The Needed Tools
Here are essential tools you should prepare to set up the nitro RC car.
You may not need all the items on this list, but most of them come in handy at one point:
- A basic starter set with a screwdriver, glow plug wrench, and two Phillips screwdrivers (small and medium size).
- A tipped hex wrench (1,5 mm with a hardened tip). Don’t use L-shape hex wrenches and cheaper plastic products. They will wear down quickly when contacting the grub screws.
- Another 2,5 mm hex wrench (ensure that it fits your RC car’s engine).
Read more: Are Nitro RC Cars Hard to Maintain?
Step 2: Tighten The Car’s Screws
Most nitro RC cars have metal bolts and screws that connect their components.
Too cold temperatures can make these screws shrink and loosen from the bolts. This is a common issue for nitro cars shifting from warm to cold regions.
So, tightening the screws on a new car is very crucial. However, stop when you feel the pinch because over-tightening can break or wear down the screws.
The most crucial part is the screws that connect the manifold with the engine, which can cause an air leak if it’s loosened. Then, move on to the engine’s screws that hold it in place.
Pay attention to the head screws on the engines. These minor screws are susceptible to stripping, so ensure to use a screwdriver with a matching tip.
Step 3: Adjust The Car’s Idle Screws
It’s crucial to prevent too much air from leaking inside the engine since it will magnify the explosion, making the car impossible to start.
So the next important step is adjusting the car’s idle screws.
Remember to turn off the car’s power and radio handset. Then, remove the RC car’s air filter to access the carb hole and slowly turn its throttle.
Use your hand to rotate the throttle counterclockwise, and it will slowly open.
Now just rotate a little and then close the whole completely; just spare a small 1.5 mm gap opened.
You can repeat the same process over and over again until reaching that 1 mm to 1,5 mm gap.
To deal with too small holes, you can do the same steps but rotate the throttle in the opposite direction.
Keep adjusting until the hole is neither too large nor too small, and ensure a proper level of airflow.
Step 4: Adjust The High Speed (Main) Needle
The idle screw setting step helps control and put the airflow inside at an optimal level for an explosion.
Now what you must do is adjust the high-speed needle that regulates how much fuel can get in the car’s engine.
Similar to the idle screw’s throttle, you can turn the screw clockwise to close the hole and counterclockwise to open it.
Again, setting up a balance hole is crucial because neither too little nor too much fuel will do any good to the engine.
If too much fuel is sucked into the nitro engine, the car will spit out excessive liquid when you turn it on. But too little or no fuel present will dry the machine and even break it.
For these reasons, your goal is to adjust the screw, so the amount of fuel sucked into the nitro engine is just enough.
Generally, the gap between the screw head’s top and the surrounding should reach 2 mm.
Step 5: Adjust (Or Don’t!) The Car’s Low-Speed Needle
Usually, the low-speed needle is perfectly set in position by the manufacturer.
But the transportation process may move its position, or you accidentally adjust the needle without knowing.
If you haven’t touched this part, feel free to skip this step. Those who accidentally adjusted the needle should not worry too much, either.
This component keeps the fuel from flowing out, like a pipeline’s throttle.
The best position is that only the needle’s tip is in the fuel tube. Open the throttle and remove the screw slightly until you see the needle’s tip.
Then, tighten the end to just 1 mm from the opposite tube.
Step 6: Check The Car’s Flywheel And Clutch
Use the plug wrench to remove the car’s glow plug on top of its engine.
Now you’ll see a metallic disc on the engine’s front called the flywheel. Hold that component still using your finger.
In the meantime, try pulling the start slightly. Pulling the start will make the flywheel rotate, which should not be possible since you’re holding it firmly.
If the start can be pulled and the flywheel doesn’t turn, it may have been loosened.
Now do the same thing with the clutch bell by holding it with your finger.
Try to pull the start in the meantime. If you feel the metal scraping inside the clutch bell, there’s a problem with the clutch spring.
Step 7: Unflood The Engine
Unflooding the engine is not needed if it’s the first time you start the nitro RC car.
If the start is hard to pull after several usage times, you can flip the car upside down and pull the start 7 to 8 times.
This step will help your car’s engine spit out the excessive fuel inside that makes it hard to start.
Step 8: Check The Car’s Glow Plug And Glow Start
The glow plug’s main function is to ignite the air and fuel mixture, while the glow start is like the burning material.
You must clip these two parts together to start the nitro RC car.
After the engine starts, you can remove the glow plug since the ignition is already set up.
Also, the glow start will drain the battery faster when you attach the glow plug, so always pull it out when not in use.
Step 9: Starting And Priming The Engine
Priming is putting the provided fuel into the engine. Now put your finger on the exhaust hole and start the vehicle.
You will see the fuel running up inside the tube between your RC’s car fuel tank and engine.
The fuel doesn’t have any color, so it’s a little hard to see. Just put in a small amount, or you’ll flood the engine with excessive fuel.
Then release the exhaust hole and finish the priming.
If you need a clearer demonstration, consider following this video to learn more!
Final Thoughts
That is everything you need to know before starting a nitro RC car. I hope that the guides can help you cut down on time and effort to enjoy your new toy.
If there’re any problems or obstacles in the setup process, feel free to comment and share them with me. Thank you for your precious time!


